In order to build your application, run it and debug it, your project needs information about the target execution environment. The target can be a simulator or an evaluation board. If you are using the TASKING simulator you do not need to configure a target, you only need a launch configuration to start the debugger.
If you are using an evaluation board you have to create a launch configuration for your board in order to debug on a board. For all boards you also need to import a board configuration into your project. Based on your selections your project settings are adjusted, such as memory settings, the linker script file (added LSL statements have the tag "dtc") and startup code.
The steps below are only necessary if you have not configured the target when you created a project with the New C/C++ Project wizard, or if you want to create another configuration.
Import TriCore board configuration
From the File menu in Eclipse, select Import.
The Import wizard appears.
Expand TASKING C/C++, select Board Configuration and click Next.
The Import Board Configuration page appears.
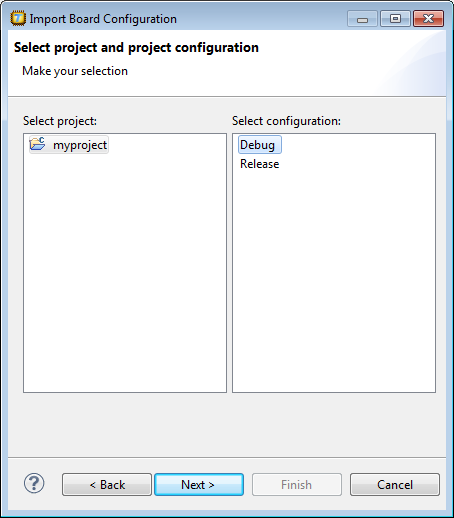
Select your project (
myproject) and project configuration (Debug) and click Next.The Select a processor page appears.
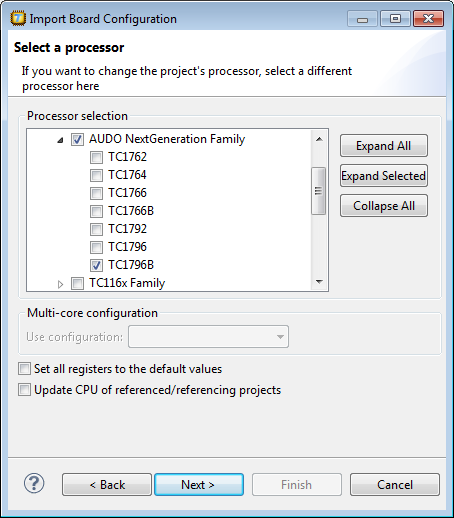
If you want to change the project's processor, select a different processor.
If you changed the processor, you can choose to reset the register values and update the processor selection of related projects.
Enable Set all registers to the default values if you want to make sure that you start debugging with the default register values.
Enable Update CPU of referenced/referencing projects if you want to make sure that all projects related to your active project have the same processor selected.
Click Next.
The Select a target and configuration page appears.
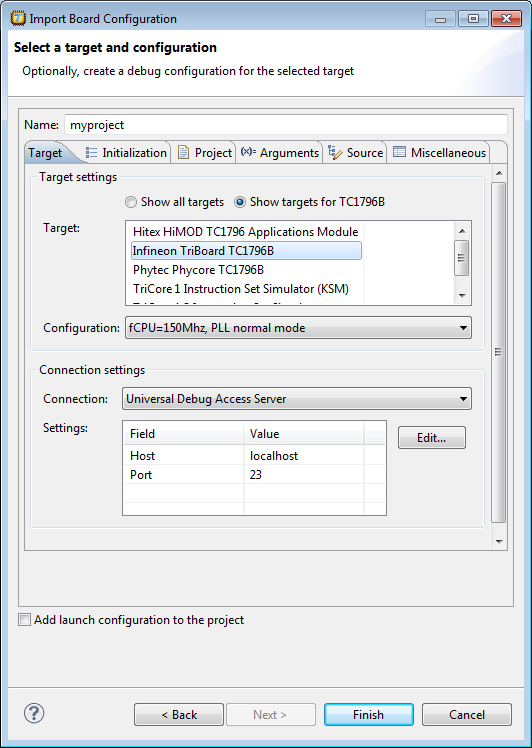
In the Target field, select the target evaluation board that you use to debug your application. By default only the boards are shown for the selected processor.
In the Configuration field, select the configuration that matches the settings on your board.
Enable Add launch configuration to the project. This allows you to debug your project.
For more information, see section Creating a Customized Debug Configuration in Chapter Using the Debugger of the TASKING VX-toolset for TriCore User Guide.
Click the Finish button to import the configuration settings.
Your project settings, such as memory, flash settings and LSL file (myproject.lsl) and startup code (cstart.h) are adjusted to the selected board configuration for you to build your application. Note that only those registers are changed that are needed for the board to operate.
The information in the Import Board Configuration wizard is based on Debug Target Configuration (DTC) files. DTC files define all possible configurations for a debug target. The files are located in the etc directory of the installed product and use .dtc as filename suffix. For more information on DTC files, see the TASKING VX-toolset for TriCore User Guide.